Your first Python project in Positron


Positron is Posit’s next-generation data science IDE. In this tutorial, you’ll learn how to get started with your first Python project in Positron. Specifically, you’ll learn how to:
- Create and open a project folder
- Set up a virtual environment
- Create Quarto and Python files
- Explore your data and variables
- Deploy to Posit Connect
We’ll walk through each step. Watch the video, or read more below.
Tip
To learn more about Positron’s UI, take a look at this blog post or the accompanying video.
Prerequisites
Before you get started, you will need to download Positron and a Python interpreter. You can download Positron here. Learn more here.
Create or open a folder
The first step is to open a folder. Opening a folder creates a workspace in Positron, setting the working directory to the path of the folder.
You can either open an existing folder or create a new one. We’ll create a new folder for our Python project.
Click New folder, then select Python Project. Name the folder first-python-project, and select an appropriate location for the folder.
Check the box next to Initialize Git repository to set up a Git repository for your project. If you don’t use Git or don’t have it set up, you can skip this step.
Virtual environment
Next, the new folder wizard will prompt you to set up a virtual environment. Select Create a new virtual environment, then select a method to create a virtual environment. We’ll use venv. You can also use uv or conda, if you have them installed.
Then, select a Python version and click Create.
Positron will now:
- Open your new folder, displaying the files in the folder in the file explorer on the left.
- Create and activate a new virtual environment.
Much of the setup for a new Python project is already done!
Tip
Note that you can also create a virtual environment from the command palette. Use Cmd/Ctrl + Shift + P to open the command palette, search for and select “Python: Create Environment”, then follow the prompts.
Install packages
Now that your environment is active, the next step is to install the packages you’ll need for your project. For now, let’s install jupyter, pandas, and matplotlib.
Open the Terminal and run:
pip install jupyter pandas matplotlib Tip
We’ll need Jupyter to render Quarto documents.
To make your environment reproducible, create a requirements.txt file by running the following line in the Terminal:
pip freeze > requirements.txtThis file lists all packages in your environment and their versions. You (or a teammate) can recreate the environment later with:
pip install -r requirements.txtPositron will also recognize if your folder contains a requirements.txt file and will automatically ask if you’d like to install the packages listed there.
Note
When you create a new Python project in Positron, by default, it also includes a pyproject.toml file. This file describes a Python project, including its name, version, required Python version, and dependencies. It’s most useful when you plan to build or distribute a package. For now, we’ll continue using requirements.txt, which works well for simple projects and reproducibility.
Create files
Now that we have a virtual environment set up with some packages, we can start adding files to our project and running Python.
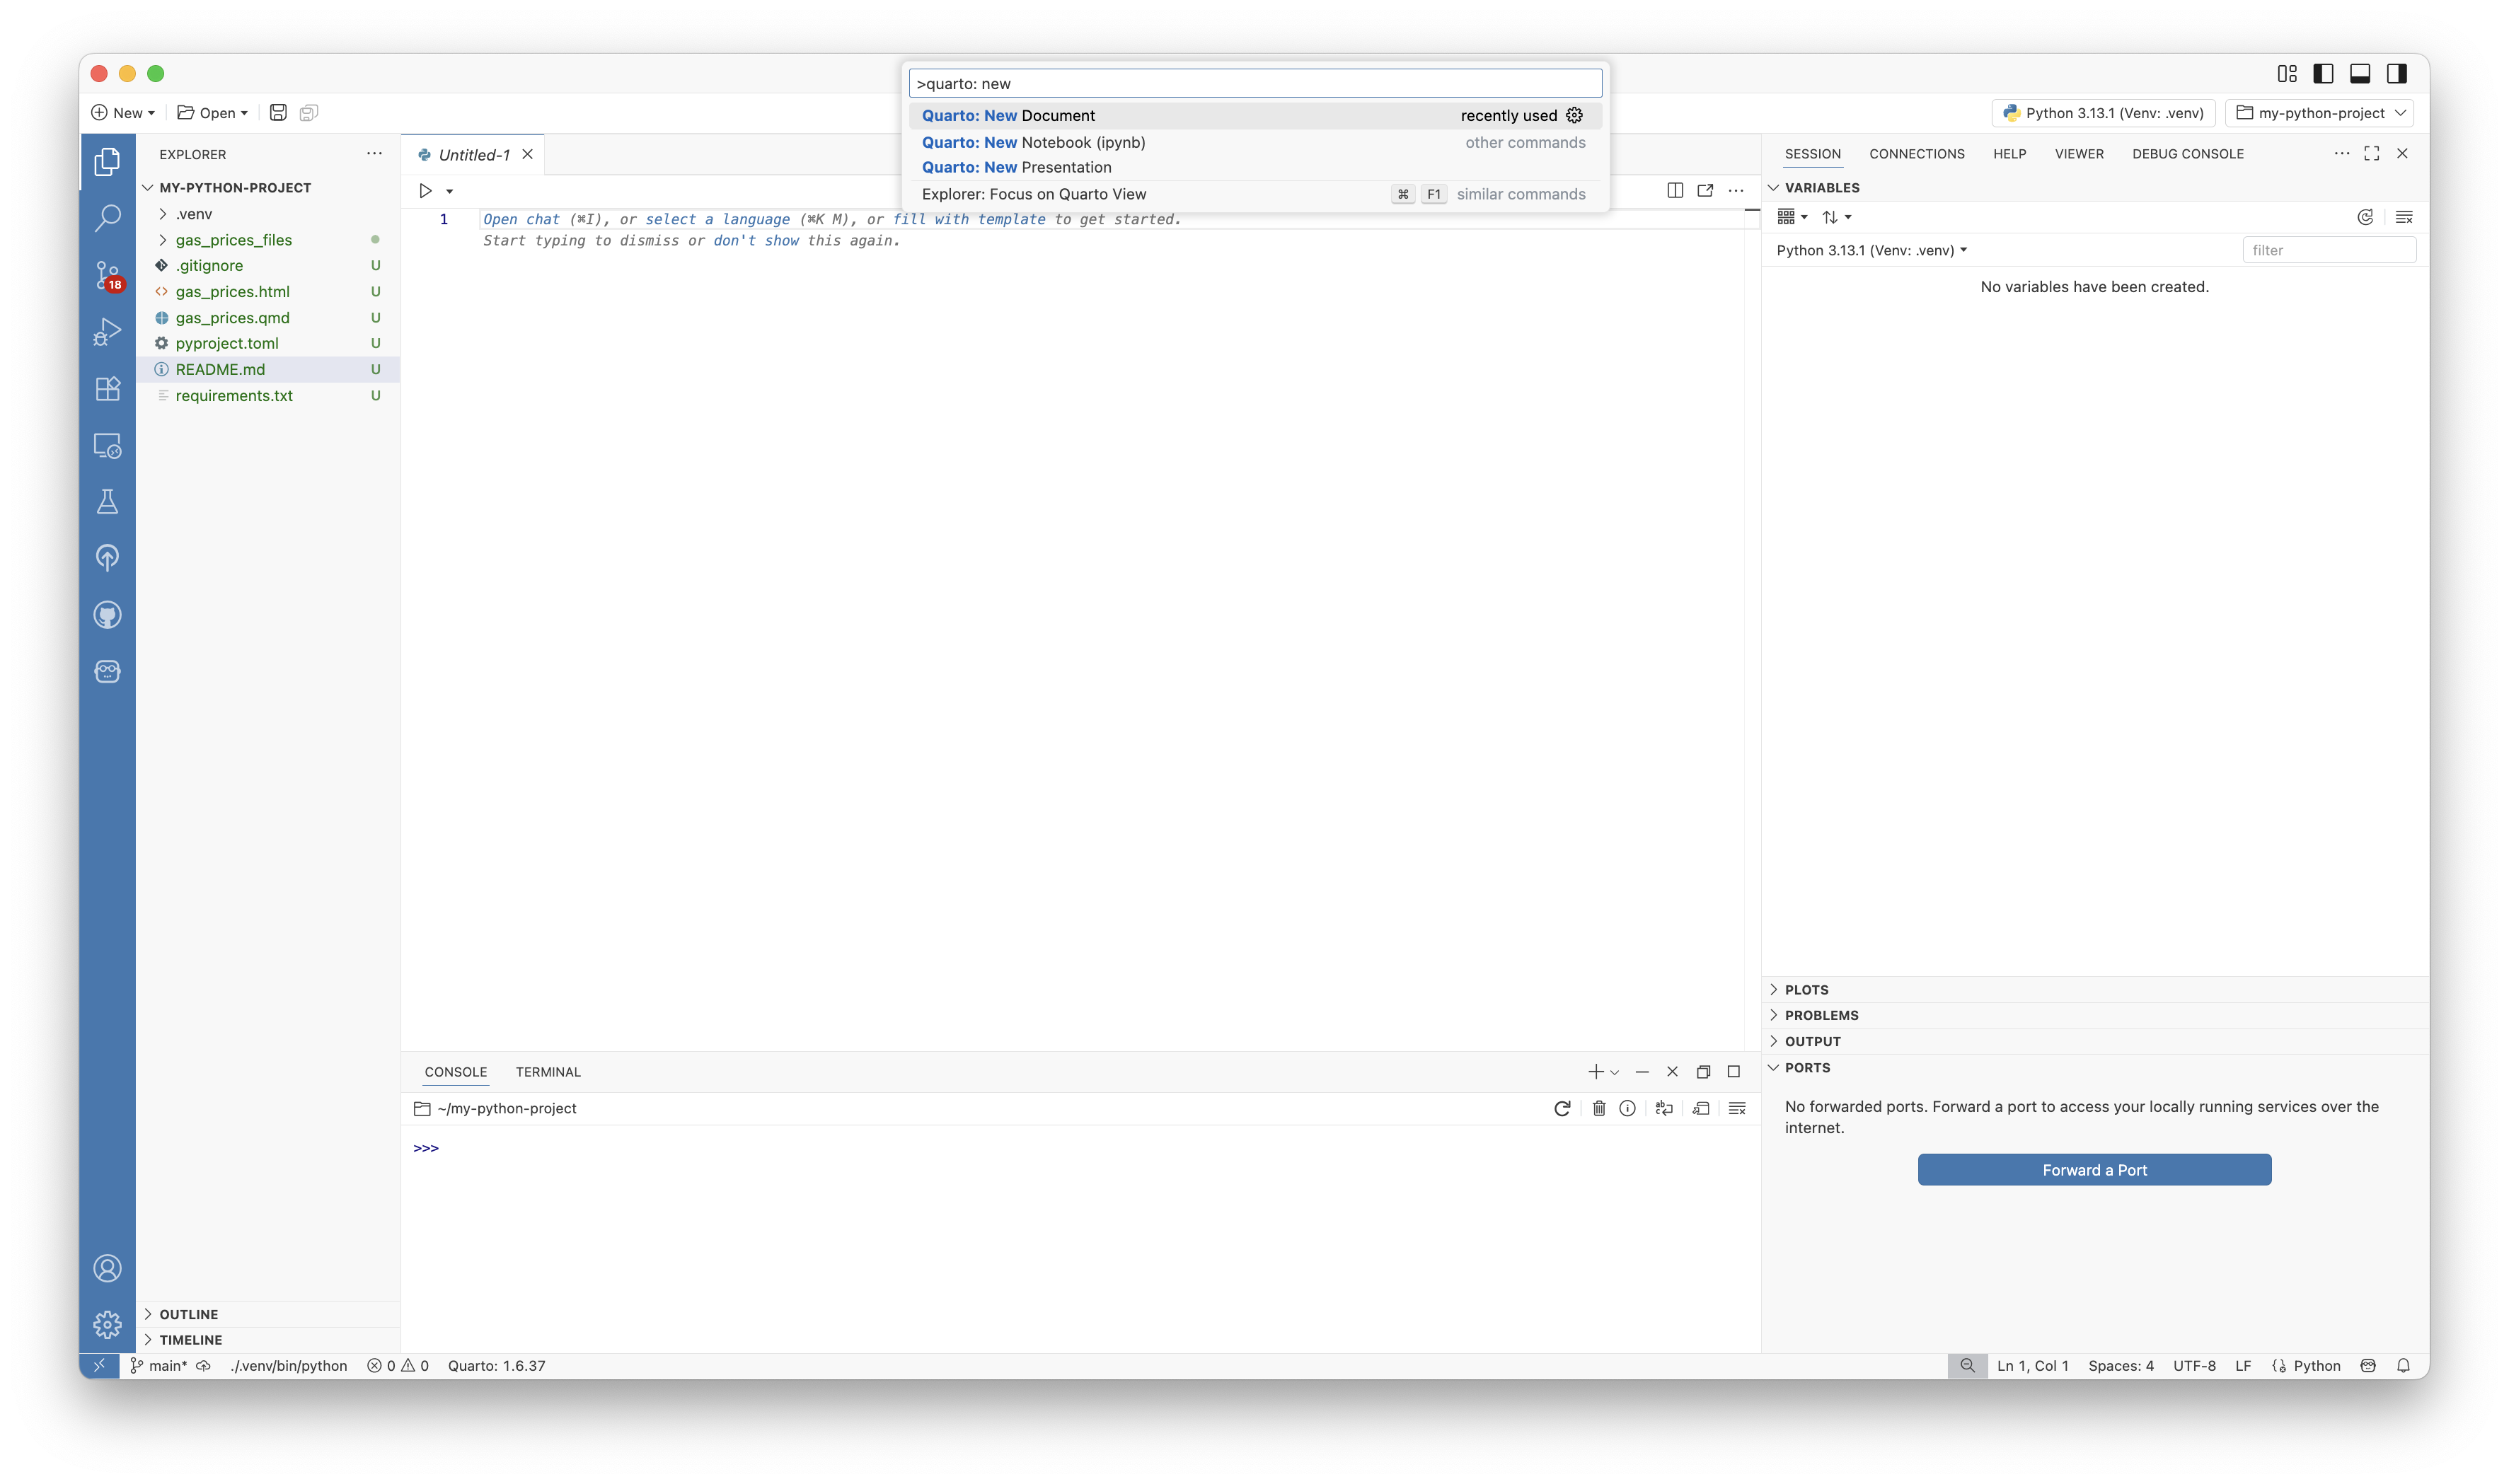
Let’s create a Quarto document. Open the Command Palette (Cmd/Ctrl + Shift + P) and search for and select “Quarto: New Document”. This will open a new, empty Quarto document.
Tip
If you’d prefer to work in a Jupyter notebook, Jupyter notebooks also work in Positron right out of the box. You can learn more about using Jupyter notebooks in Positron here.
Explore data
Create a new chunk with Cmd/Ctrl + Shift + I, then copy and paste in the following code to read in TidyTuesday data on weekly US gasoline prices:
import pandas as pd
import matplotlib.pyplot as plt

data_url = 'https://raw.githubusercontent.com/rfordatascience/tidytuesday/main/data/2025/2025-07-01/weekly_gas_prices.csv'
df = pd.read_csv(data_url, parse_dates=["date"])
Run the code by clicking Run cell or with Cmd/Ctrl + Shift + Enter.
Now that we’ve loaded the data, we can take a look at it in the Variables pane and Data Explorer. The Variables pane shows loaded variables.
To open the Data Explorer, click on the dataset icon next to df in the Variables pane. This opens the Data Explorer, a spreadsheet-style viewer where you can sort, filter, and preview summary statistics.
Plot
Next, let’s plot the data. Copy and paste the following code into a new cell in your Quarto document.
filtered = df[
(df["fuel"] == "gasoline") &
(df["formulation"] == "all")
]
filtered = filtered.sort_values("date")
for grade, group in filtered.groupby("grade"):
plt.plot(group["date"], group["price"], label=grade)
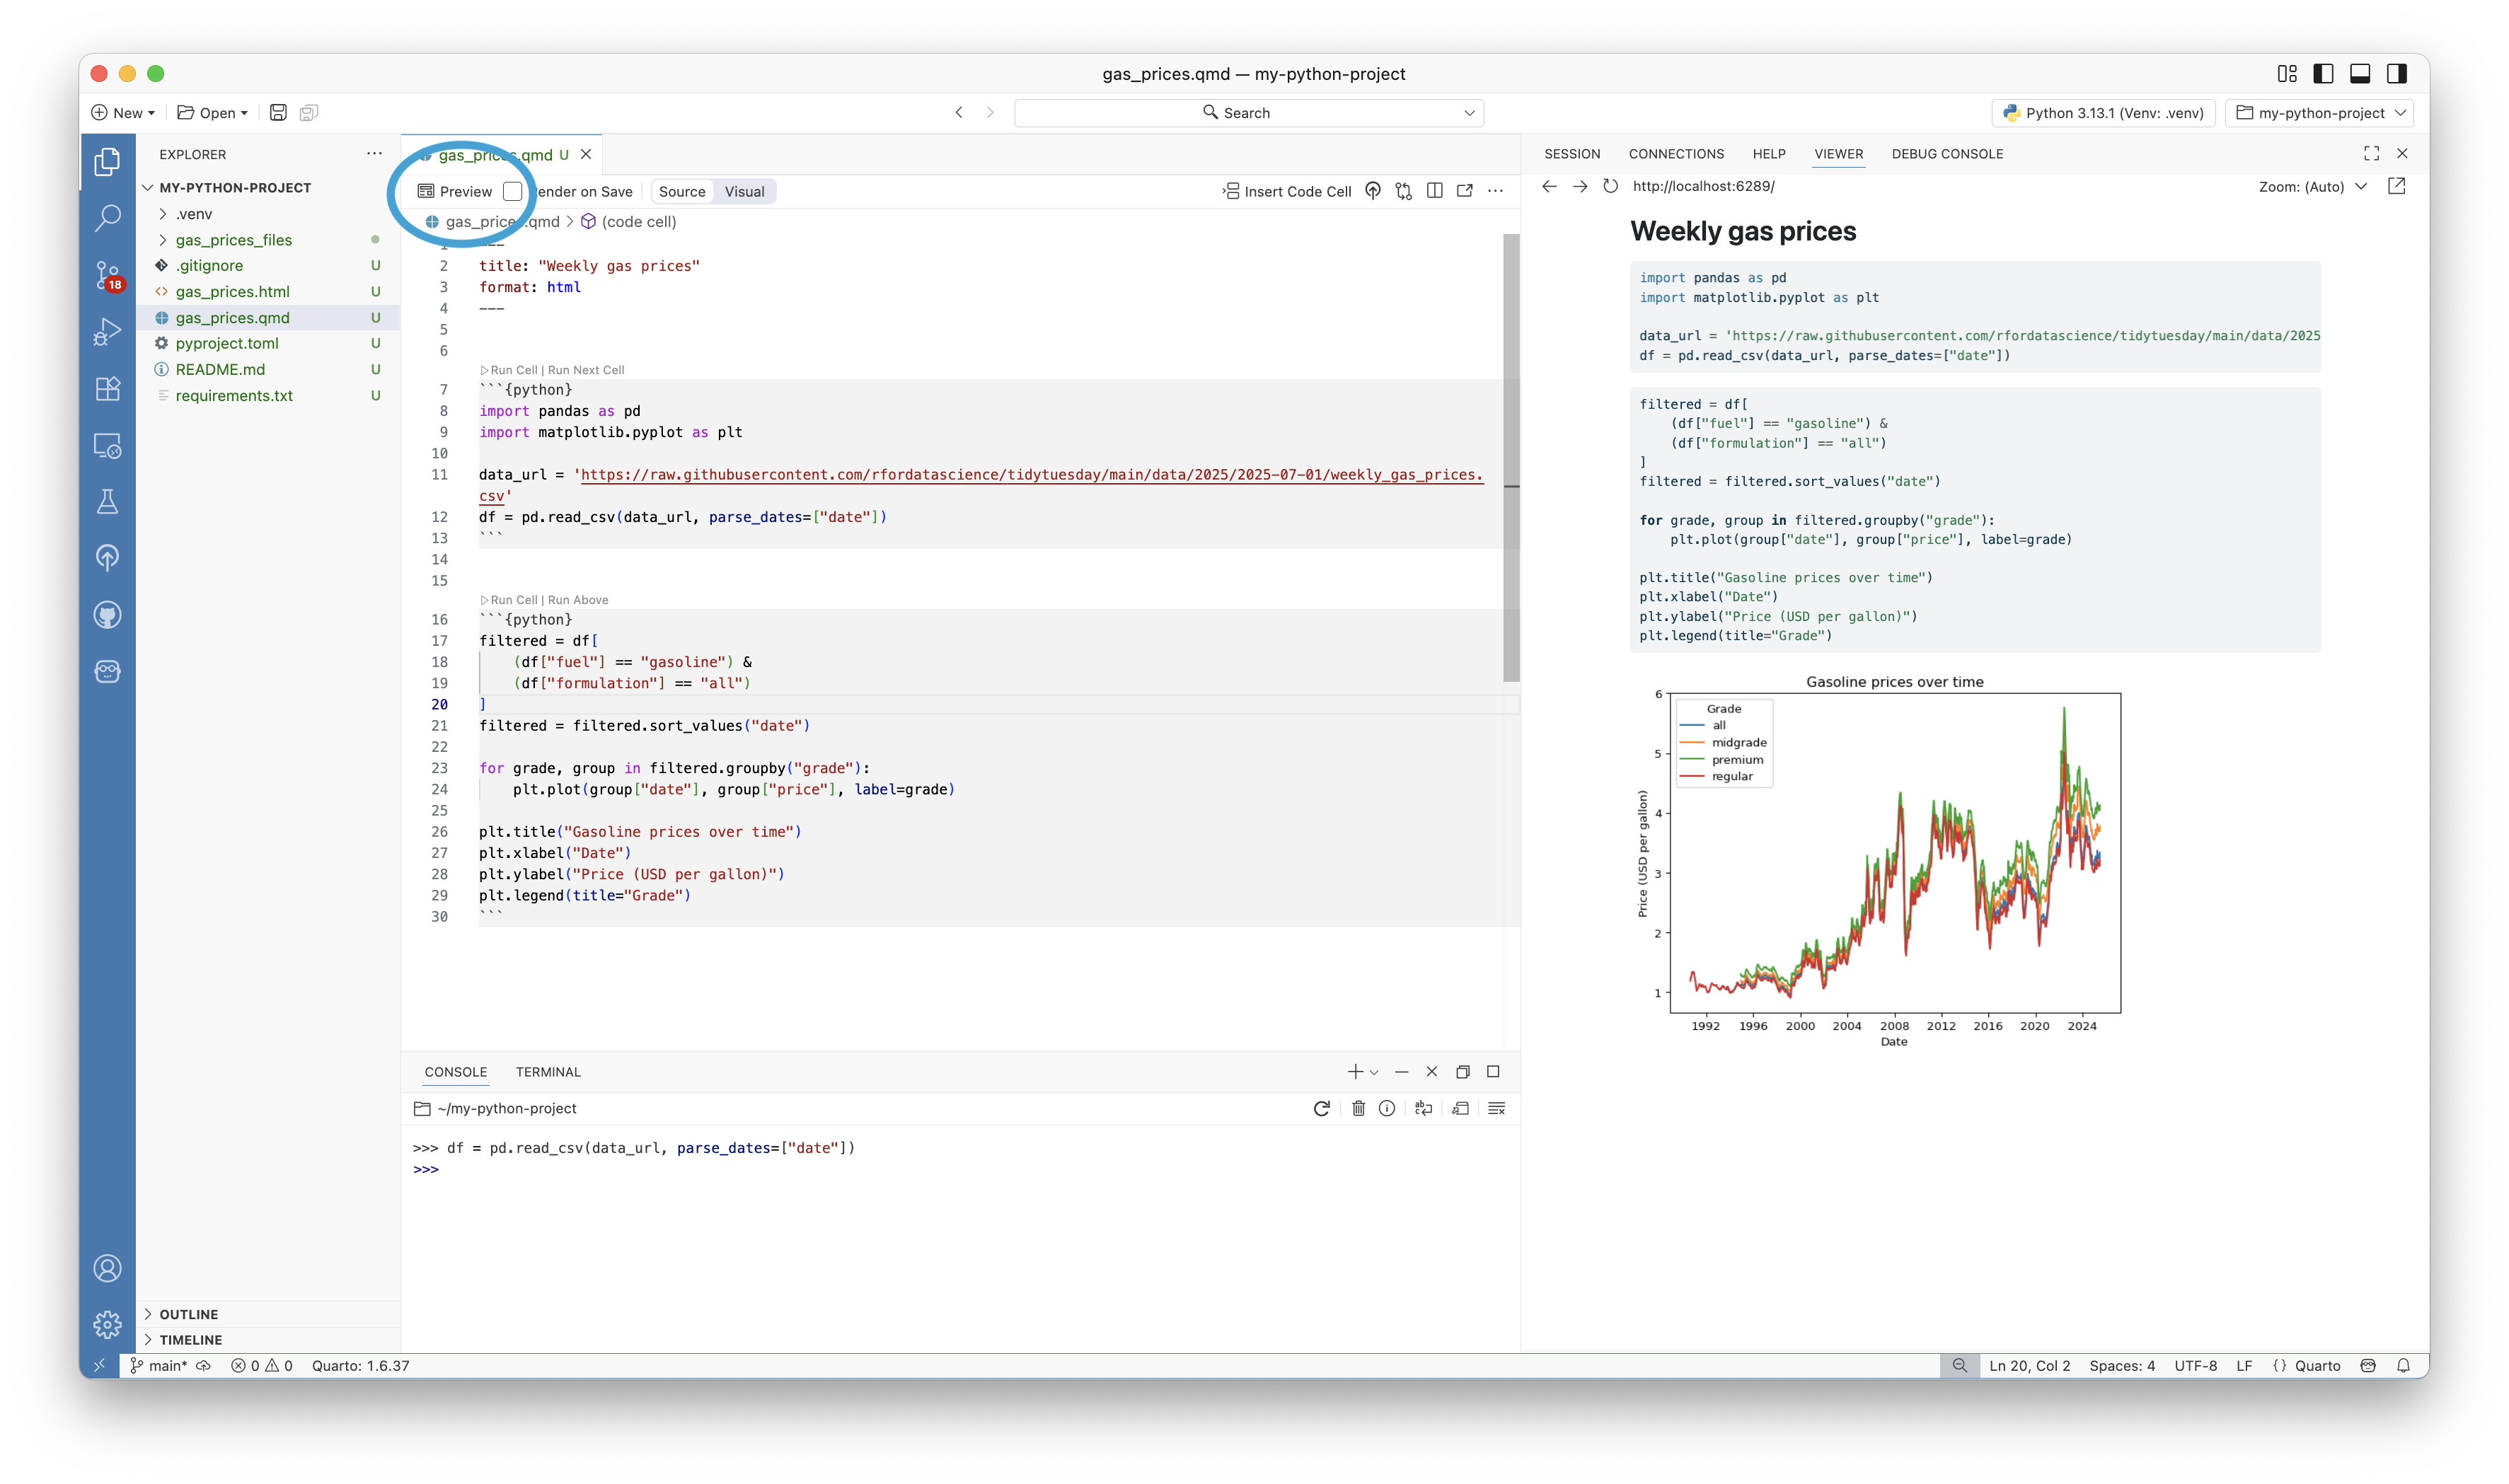
plt.title("Gasoline prices over time")
plt.xlabel("Date")
plt.ylabel("Price (USD per gallon)")
plt.legend(title="Grade")Run the code. Notice that the plot shows up in the plot pane on the right-hand side.
Render Quarto
Now, we can render our Quarto document. Click the Preview button in the upper-left corner of the Editor to preview your Quarto document. A rendered version will show up in Positron’s Viewer pane.
Version control
Positron makes it easy to version your work with Git. You should already have a Git repository initialized from when you created the project, but if not, you can also initialize Git within an existing folder.
You can stage, commit, and push changes to GitHub from the Source Control view in the Activity Bar:
- Click on the Source Control view. The icon looks like this:
 .
. - Click the
+next to each of the files you want to stage for commit. You can also click the+next to the Changes header to stage all changed files. - Add a commit message in the text box above the Commit button, then click Commit.
- Click Publish Branch (the small cloud icon in the Graph section). This will create the corresponding remote on GitHub and push your changes.
Learn more about Git version control in Positron here.
Deploy
Finally, let’s deploy our Quarto document so that we can share the rendered version with others.
If you have access to Posit Connect, you can deploy directly from Positron by using Posit Publisher:
- Click on Posit Publisher in the Activity Bar.
- Click the
+to create a new deployment. - Select your Quarto document.
- Choose the deployment location. Note: if this is your first time deploying to Connect from Positron, you will need to authenticate.
- Click the blue Deploy Your Project button.
Learn more: https://docs.posit.co/connect/user/publishing-positron-vscode/.
Tip
If you don’t have Posit Connect, you can use Posit Connect Cloud and deploy from GitHub.
Wrap up
You’ve now created your first Python project in Positron. From here, you can continue developing your project and explore additional features in the IDE.
To go further:
- Explore Positron’s support for Jupyter notebooks.
- Learn how to conduct exploratory data analysis in Positron.
- Set up Positron Assistant to get AI assistance within Positron.

Sara Altman
Related Content

Score a Disease Surveillance Model Inside Snowflake, Without Moving

Governed AI for Public Health: Reading Free-Text Records with Snowflak...
